Users

To be able to use the Aimplan custom visuals in Power BI, each user must be a registered user within Aimplan. This section describes how to add and administrate user settings.
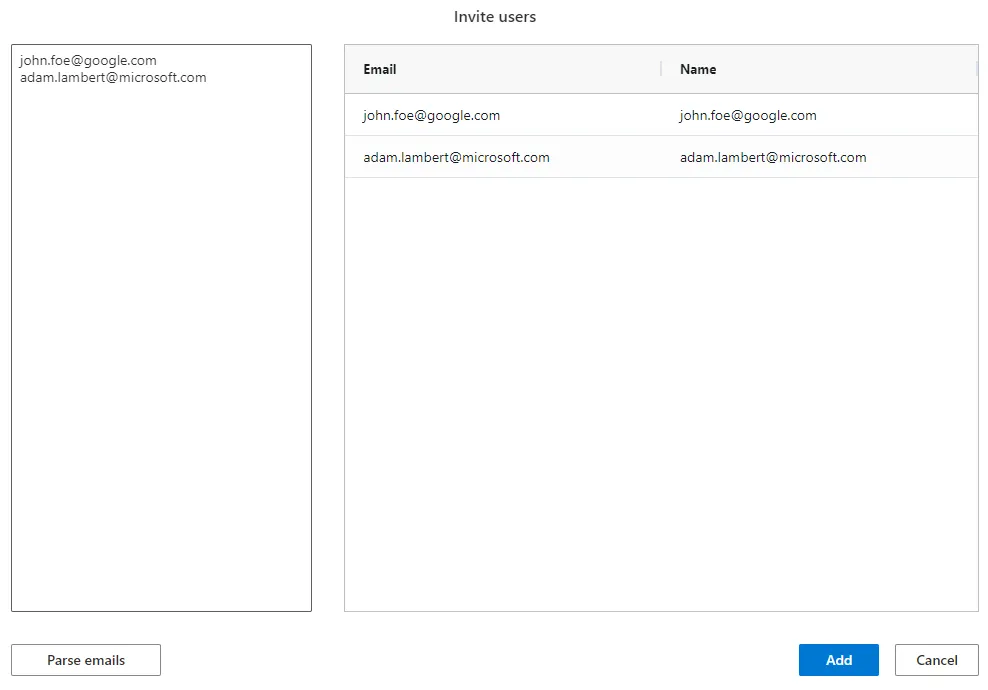
You add users by pasting one or many e-mail addresses into the system. Each user will then become a new user, but no invitation e-mail will be sent. When you add a user, their 'name' will default become their e-mail address. If a user uses their M365 credentials to login to the system, the users first name and last name from your M365 / Azure AD tenant will become the 'Name' of the person.
- Paste your list of e-mail in the left text-box. Each e-mail can be separated by blank spaces, commas, semicolons or row breaks.
- Click the 'Add' button in the User toolbar
- Click the 'Parse emails' button
- Click the 'Add' button and wait for a few seconds. The new users will be created.

Each user receive a unique user 'Id'. This Id will be the UserKey that will be stored on each record they add or update using the Aimplan Power BI visuals.

When a new user is added it automatically gets the "Full User" role which means that the user can use all Aimplan features in Power BI.
There are six different types of roles a user can belong to. These roles are:
- Super Administrator: Can do everything in both the portal and within the visuals. This, together with Consultant, is the only user role able to manage storage tables in the portal.
- Administrator: Can do everything except managing storage tables in the portal, meaning they can add/edit measures, scenarios and users in the portal. Can use all features in Aimplan visuals.
- Full User: Can use all features in all Aimplan visuals, e.g. add/edit input values in the visuals, but cannot add/edit any parts in the portal.
- Data Input Only: Can only use the Data Input Visual in Aimplan.
- Report Only: Can only read reports in Aimplan visuals, not add/edit values.
- Consultant: Equals to Super Administrator but isn't included in the licenses.
To edit the user settings, click the 'Edit' button in the toolbar. You can edit the Name of each user,change if the user is an administrator or not and finally archive a user.
By archiving a user, this user will not be able to login to the portal anymore and the instance will not pop up in the instance list.
In certain circumstances there are thing you can't do while editing the users.
- You can’t archive yourself.
- You can’t archive a Super Administrator, you’ll need to change the role before.
- There must be at least one Super Administrator so you can’t change a Super Administrator’s role if the user is the only Super Administrator.
- Only a Super Administrator or Consultant can change a Super Administrator’s role. If you aren’t a Super Administrator, you don’t have the Super Administrator item in the drop down.
See Organization and Categories to learn about how to manage organizations and categories.