Extended Table
Currently, Microsoft has disabled the functionality to fetch tables and columns from the Semantic Model. This is under investigation, but for now, you will need to manually input the Power BI table name.
Extended table adds read-only columns that are not part of the chosen Storage table. These columns are fetched from a Semantic model and are shown in the grid. When a Semantic model is attached, number of rows that will be showed in the grid will be a merged result from the Storage table and the Semantic model.
To fetch data from a Semantic model, the end user must have access to the workspace.
If the end user is a workspace viewer, it need Build permissions in the semantic model that you are referencing for RLS (Row Level Security) to work. See https://learn.microsoft.com/en-us/power-bi/connect-data/service-datasets-manage-access-permissions
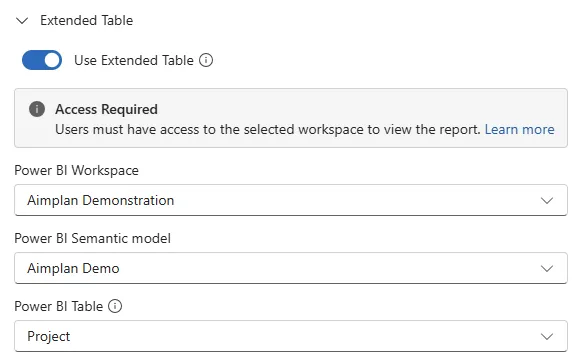
When Use Extended Table is toggled on, you will see three dropdowns which let you set from which table the data should be coming from.
The first time you toggle on the Semantic model, you must grant Aimplan permission to access your semantic model.

If an error occurs behind the Power BI Table drop down, the tenant ID may be wrong (se Advanced )

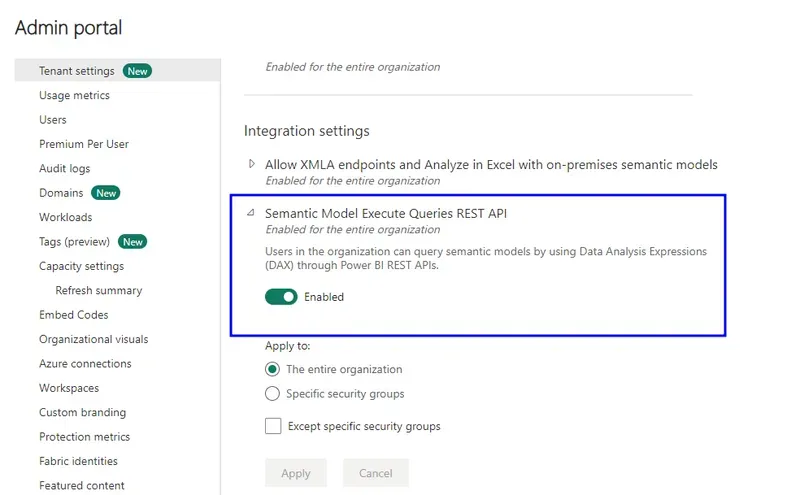
If the tenant ID is correct, you must also allow users to execute REST API queries against the semantic model. Please note that you need to have administrator privileges in Power BI to perform these steps.
To use an Extended table, you must select a Workspace, Semantic Model, and a table within the model.
Once a table is selected, all columns within that table will be displayed in the field list on the left. Each Semantic column is marked with a special icon and they cannot be edited. You can hide columns though. You can actually format each column in the same way as an ordinary Storage Table column, see Field Settings

The list of tables is filtered based on the primary key columns defined in the Storage table. The table must contain all the primary key columns to be shown in the list.
When you preview the report (see below), you will see the chosen columns in the Data Input Table. When editing, the columns from the Semantic model are disabled.
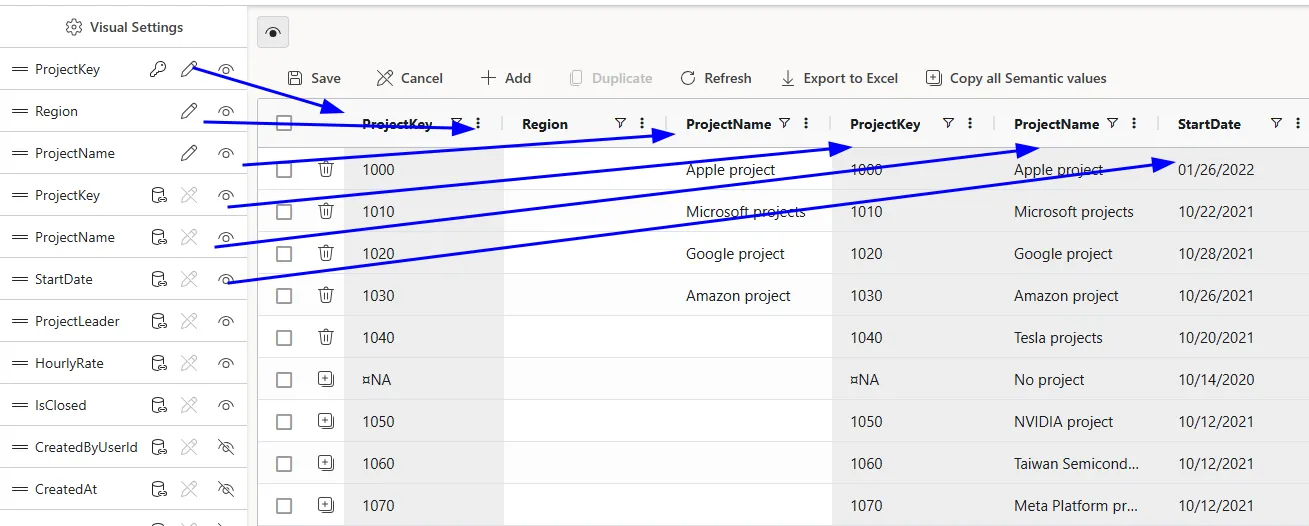
As you can see, the rows that have matching keys (ProjectKey) are merged together. The rows that exists in the Extended Table but are missing in the Storage Table are showed below all rows in the Storage Table. When you go into Edit mode it's easier to see what kind of row it is.
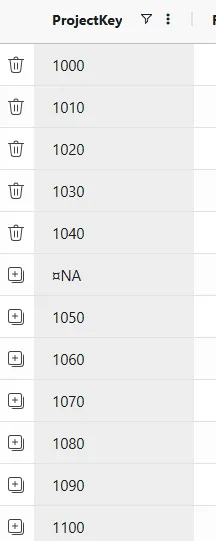
Rows that exists in the Storage Table will have a trashcan and that is because these rows can actually be removed from the Storage Table. Rows that only exist in the Extended Table has an Add button and that is because these rows can be added to the Storage Table. The By clicking on the Add button, the row will turn to a green color which will tell you the rows will be saved when the Save button is clicked.
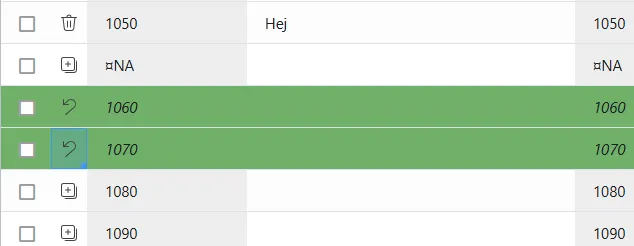
If you want you can undo this by clicking on the Undo button on the row. The Add button is usually nice to have when you are displaying the Semantic value in a Storage Table column (see later in this chapter) but you can use it like this also. If you have mandatory fields that must be filled in on the row, you must do so to avoid a failed save.
Instead of clicking on the Add button, you could also just change a field value on a row and the row will be added to the Storage Table.
Mark all Extended Rows
If you want all rows that are missing in the Storage Table you can click on the "Copy all Semantic values" in the toolbar. This will mark all rows are missing in the Storage Table to green.
If you have a field in your Storage table that matches a field in the Extended column, you can let the Data Input Table to automatically display the value from the Extended column in the Storage Table column. This is done in the Storage Table field. In our example we have the field ProjectName in both the Storage Table and the Extended table. By clicking on the ProjectName (the Storage Table field) and chose Column Styling you can toggle Display Semantic Value.
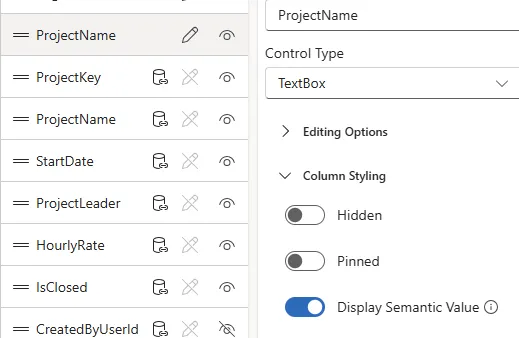
If you have Preview enabled in the settings, you will immediately see the values in the field.
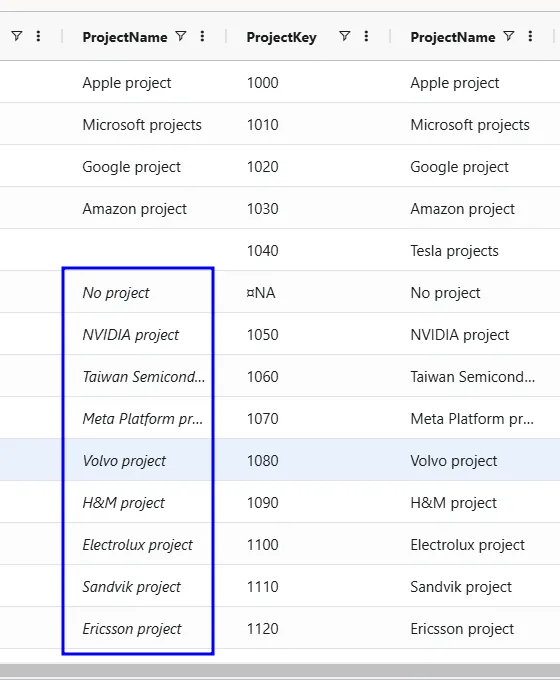
By default, the Semantic values are display in italic but you can format these values in Semantic Value Appearance. Please note that these values are only displayed in the grid and doesn't exist in the Storage Table. If you want to move them to the Storage Table you can click on the Add button as explained above.
You can drag a filter measure into the the Filters field box to filter out values from the semantic model data. This is done in the same way as described in Filter Data Using Slicers, by creating a comma separated measure that generates the values you want to filter out. Make sure to name the mesasure exactly as the field name in the Semantic model and only values that match the filter string is fetched from the Semantic model.